

how to use faber castell watercolor pencils
Everyone's familiar with watercolor paintings, but did you know you can create similar art with pencils? In this guide to watercolor pencils, I'll give you an overview of this medium and show you how to get started.
What are Watercolor Pencils?
Watercolor pencils look just like regular colored pencils. The difference is that they react to water and can create effects similar to watercolor paints.
The binding in watercolor pencil pigments is water-soluble. When you add water, the binding releases more pigment, resulting in intense colors.
Traditional colored pencils use an oil or wax-based binder, which allows them to stick to a paper's surface and are better suited for layering and blending.
You can't blend and layer with watercolor pencils the same way, but you can achieve some interesting effects by adding water.
Watercolor Pencils vs. Paints
So how do watercolor pencils compare to paints? Are they just watercolors in pencil form?
Not exactly. These are two separate but related media.
Mastering watercolor pencils won't make you a master painter. And even seasoned painters would need to brush up on techniques if they decided to switch to pencils.
However, watercolor pencils and paint complement each other well. You can use pencils to add details to your watercolor painting. Or create a background with paints and draw the main subject with pencils.
Both media teach you to work with pigments and water.
Watercolor painting is notorious for being the most difficult type of painting. Watercolor pencils can be a way to ease into watercolor painting. You'll learn how water affects pigments, moves paint across a page, and blends colors.
Benefits of Watercolor Pencils
You can sum up the benefits of using watercolor pencils over paints in three points:
- Control
- Detail
- Convenience
A pencil is easier for most people to control than a brush. That alone makes watercolor pencils less intimidating. They also require less water, which is the most unpredictable aspect of watercolor. Having better control over water gives you more control over the pigments on the page.
Pencils also let you include more detail. The sharp point of a watercolor pencil allows you to lay down more visual information than the flexible point of a brush. If you want a particularly crisp line, you don't even have to add water.
Watercolor pencils are also a convenient way to paint in color. Unlike paints, all you need are the pencils of your choice, a brush, and a small amount of water.
What Materials Do You Need?
- Watercolor pencils
- Paper
- Brush of your choice
- Graphite pencil (optional)
- Masking fluid (optional)
Watercolor Pencils
If you're just starting out, choose a basic set of 12 watercolor pencils. For those on a strict budget, or just feeling adventurous, you can get by with only the three primary colors: red, yellow, and blue. Black and white can be useful but aren't necessary.
High quality watercolor pencil sets are available for any skill range from beginner to professional artist. Let's take a look at a few different options.
Beginner: Derwent Watercolour Pencils
This set of 12 pencils is a great way to get started with the medium. They are affordably priced but still high quality enough that you will get the true feel of working with watercolor pencils. These Derwent pencils are easy to sharpen and are designed to be resistant to breaking. While a set of 12 pencils won't give the range to color absolutely everything, these pencils are blendable and you can layer them or soften the intensity with water, so you are able to achieve quite a wide range of shades with a relatively small amount of pencils. The pigment in these is not permanent, so you can go back after it has dried and make changes by adding more water and pigment.
Midrange: Caran D'Ache Supracolor Watercolor Pencils
The Supracolors come in a set of 30 pencils, which gives you quite a bit of additional tonal range as compared to the set of 12. The pigment core in these pencils is super soft, which, counterintuitively, means that it is stronger and less prone to breakage than harder more brittle leads.
Advanced: Derwent Inktense Water Soluble Pencils
This set of 72 pencils features bright, intense pigments that are permanent, so once they have dried, they can't be altered. This minimizes the issue of bleeding, so you can paint one color, let it dry, and then paint another color right up against it and not worry about the colors bleeding into each other.
Professional: Faber-Castell Albrecht Durer Watercolour Pencils
These are top-of-the-line watercolor pencils, and the 120 colors included in the set allow you to color essentially anything you could imagine, especially when you consider the blending and layering capabilities. The leads are resistant to breakage and these pencils provide excellent lightfastness, which means that your work won't fade from exposure to sunlight or other environmental elements.
Paper
When choosing paper, you'll want to use something that's a little thicker than your average sketching paper. Regular paper will warp and wrinkle when you add water to it. Depending on its quality, watercolor paper can hold a large amount of water without becoming distorted.
Texture
Watercolor paper comes in three textures: hot press, cold press, and rough. Many artists use a cold press paper, which has some texture or "tooth" to it. When most people think of watercolor paper, cold press is probably what comes to mind. It's ideal for creating texture.
Hot press watercolor paper is smooth, like drawing paper. But it's still thick enough to hold water without warping. Since hot press paper doesn't absorb color as quickly as cold press, you have more time to manipulate the paint before it dries.
Rough paper is similar to cold press, but it has even more texture.
Weight
You'll see papers marked with a weight such as 90 lb, 140 lb, or 300 lb.
Manufacturers measure watercolor paper by how much 500 sheets weigh. Paper with a heavier weight can hold more water.140-pound paper is the most commonly used.
You can find high-grade, affordable watercolor paper from companies like Strathmore and Canson, while professionals might choose to go with Arches or Reeves.
Some specific examples of paper from these brands that are excellent for use with watercolor pencils are as follows:
Strathmore Cold Pressed 140-Pound Watercolor Paper – This pad comes with 12 sheets of heavy duty watercolor paper. The cold pressed paper is excellent for creating texture and experimenting with your watercolor pencils. This Strathmore pad is reasonably priced and an appropriate paper for beginners and professionals alike.
Canson XL Series Watercolor Pad – At such a great price, this pad is a steal. It has 30 sheets of 140-pound cold-pressed paper, so it's durable enough to withstand several layers of washes without warping or disintegrating. The wire binding is convenient because you can flip the cover all the way open and avoid bending the pages.
Arches Rough 140-Pound Watercolor Paper – This Arches pad includes 20 sheets of watercolor paper. The rough paper creates beautiful textural effects in paintings, and each individual piece of Arches paper is inspected for quality. This is a higher end paper that would be best suited to serious or professional artists, as it's on the more expensive end.
Bellofy Artist Pro Series Sketchpad – This sketchpad comes with lighter weight 98-pound paper, so it's thinner than some of the other options on our list, but it's great for use with watercolor pencils, since you will most likely be using less water than with traditional watercolor paints.The 100 sheets in this book will last you longer than any of the other smaller pads we have discussed as well.
Brush
You won't need to put much consideration into choosing a brush for watercolor pencils. A cheap brush will get the job done.
The best quality watercolor brushes are sable, but that quality is also reflected in the price. Today, there are several synthetic brushes and sable-synthetic mix brushes that perform nearly just as well.
What you will want to consider is the brush shape and size. I typically use a round brush, but you can still achieve fine details with a flat brush. Round brushes are flexible, while flats can produce smooth, even backgrounds.

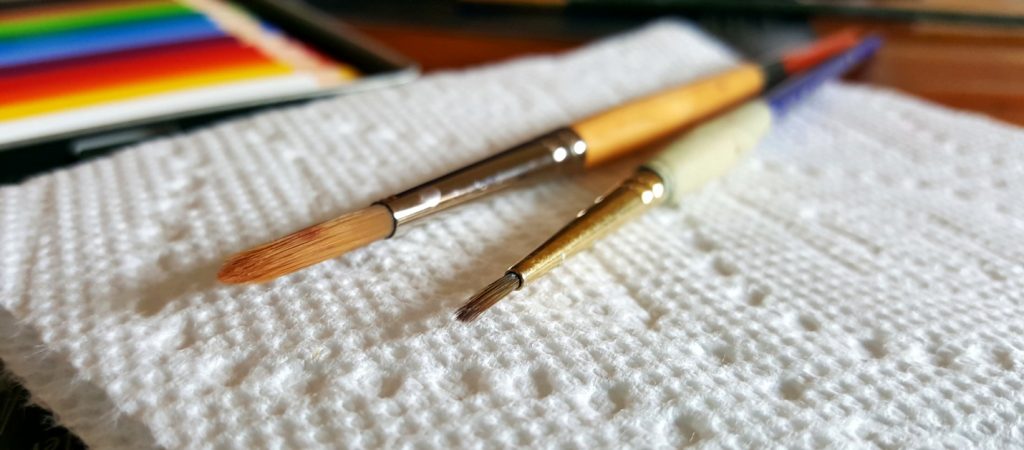
For small watercolor pencil drawings, size 4 is my standard choice, with size 2 for really fine details.
Check a brush sizing chart to see your options. Consider how large you'll be working and choose a few brushes accordingly. Keep in mind that a larger brush will hold more water, so beginners may want to start small.
A great option for beginners is the Transon Round Brush Set . This set is very reasonably priced and it includes eight differently sized round brushes. The brushes are made from a combination of nylon and goat hair, which means they will hold water well and brush it on smoothly.
For more versatility, consider the Princeton Elite Set , which includes a size 2 round brush for fine details, a size 8 round brush for covering large areas, a half-inch angle shader, and three-quarter inch wash brush. These brushes are made from synthetic Kolinsky sable, and the fine points and sharp edges provide unparalleled detail capabilities.
For a super high quality, authentic sable watercolor brush, consider this da Vinci Watercolor Brush . It's made from Russian blue squirrel hair which is means it's a true sable brush, and it has excellent water-holding capabilities. The wood handle and copper wire wrap are sustainable and beautiful as well.
Optional materials
A graphite pencil can come in handy for preliminary sketches. If you have the option, go with a pencil with 2B to 4B lead for sketching. This Derwent Graphic Drawing Pencil Set provides a wide range of twelve different black and soft leads that are great for everything from sketching to drawing in fine details. The soft (B series) pencils have a thick 3.5 mm core for creating soft, smooth lines.
Another great option for sketching pencils are the Staedtler Lumograph Graphite Drawing and Sketching Pencils , which include six pencils in the set. They give a full, dark color when applied and are excellent for sketching a preliminary drawing.
Masking fluid is another convenient material. You can use this fluid to block out areas of your painting that you want to remain white or a significantly lighter color. Examples might be clouds, the shine on a piece of fruit, or the whites of a person's eyes.This Winsor & Newton Art Masking Fluid is an excellent option since it's colorless and won't stain. You simply paint it onto the spaces that you want to remain white, let it dry, apply your watercolor pencils and water around it, and then once the paint is dry you can rub off the masking fluid with your finger or a rubber eraser. It will give a crisp negative space which can be otherwise very hard to achieve with watercolor media.
The only difficulty with a clear masking fluid is that it is predictably hard to see as you apply it, so you may not be able to tell if you've sufficiently coated the desired area. To make it easier, you can opt for a colored masking fluid, like this Pebeo Drawing Gum . It's tinted blue for easy visibility
Use a cheap brush to coat those areas in masking fluid, and let it dry. Then you can draw and paint without worrying about getting any color on those sections. When you're finished, rub the masking fluid gently to remove it, revealing a clean, white surface underneath.
Watercolor Pencil Techniques
Finally, let's get into some of the techniques you can use with watercolor pencils. While most people know you can add water to a watercolor pencil drawing, there are actually several different ways to use this media. I'll start with the most common:
Technique 1: Draw First, Add Water Later
Most artists use watercolor pencils to create a drawing and add water afterward or in stages as they draw.
In this method, start by outlining your subject lightly, either with a graphite pencil or the dominant color of your subject. Note any areas that you want to keep white or very light. You can even outline the highlights.
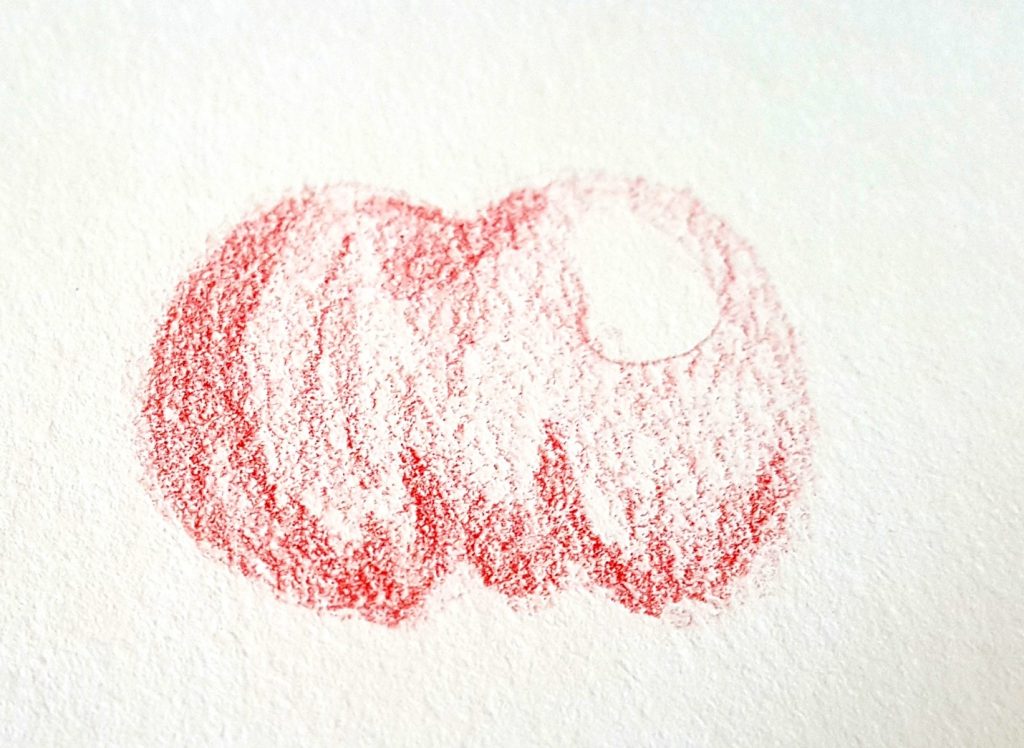
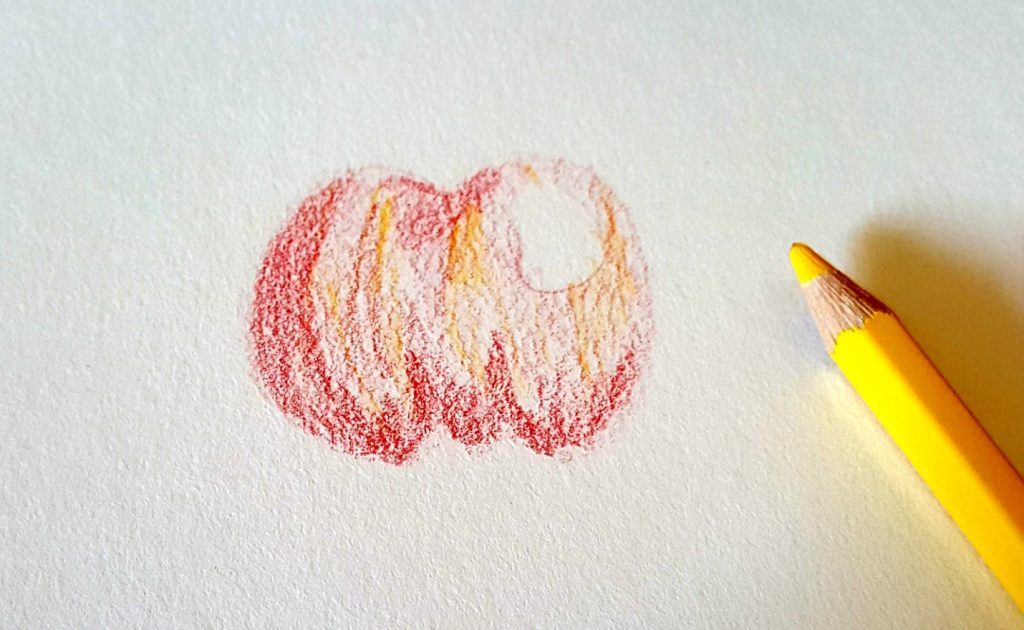
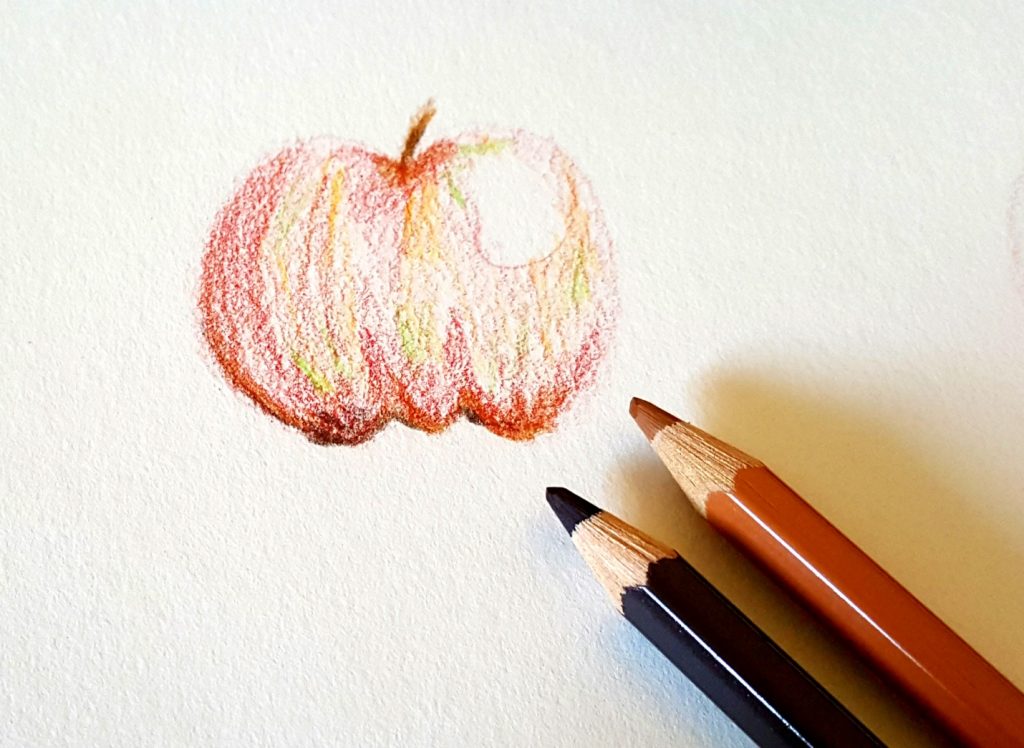
Color in your subject lightly with the main color. Add other colors, starting from the lightest and ending on the darks and shading.

Finally, it's time to add water! Wet your brush, and dab it on a paper towel to remove excess water. You don't your brush to be dripping wet on the first stroke.
Starting with the lightest areas, begin painting water onto your drawing. You'll notice that the pigments become much brighter after you add water. Rinse and wipe your brush before adding water to a new color. Otherwise, you risk overpowering the new color with the one already on your brush.


Once you fill in your entire subject, you can use the remaining pigment on your brush to create a light ground or background.
Technique 2: Dip Pencils into Water

Instead of using a brush, you can also dip your pencils directly into water. The result is a thicker, more vibrant line.
However, you'll soon realize that the water's effects don't last long. In the image above, you can see that the areas with red and brown shading start off strong and then fade into regular pencil shading.
Once you've finished using this technique, make sure to dry your pencils with a paper towel to keep them in good condition.
Technique 3: Draw onto Wet Paper

Watercolor painters use lingo like "wet-on-wet" and "wet-on-dry." This technique would be dry-on-wet.
You can wet the paper first by brushing down a light, even coat of water. Stick to the area you plan to draw on first, rather than wetting your entire paper. For this technique, you might find it useful to have large flat brush on hand.
Use a dry watercolor pencil to draw on top of the wet area. You'll find that the result is similar to dipping your pencils into water, but the effects last longer.
You'll see brighter, more intense color with a textured, grainy look. You don't have to worry about repeatedly dipping your pencil into water to keep up this effect, but you'll still need to work quickly before the paper dries.
Technique 4: Wet Pencil on Wet Paper


This wet-on-wet technique uses even more water. Using a wet pencil on a wet surface causes the colors to run, much like the watercolor painting technique. The lines you draw will look fuzzy and spread across the page.
However, unlike with painting, you'll see more pigment fragments. This technique produces a lot of texture and very bold color.
Technique 5: Add Detail to a Watercolor Painting
You can also draw on top of an existing watercolor painting. Add details or emphasize the areas of painting. Then either leave your additions as is or add water for a smoother texture.
Bonus: Use Watercolor Pencils as Portable Paints
Okay, this isn't really a technique, but one really nice benefit of watercolor pencils is that you can use them as on-the-go paints.
Pencil sets are compact and easy to carry. Much more so than paint sets. Just create your desired colors on the page first and mix in water to get your paint effects.


Monica Heilman
Monica Heilman is a Colorado-based writer and artist. She has taught writing for four years, in the US and South Korea, and is a lifelong artist. Her most memorable art experience was painting a life-sized plaster cow. You can view her writing and art on her personal website at monicaheilman.com.
Art and photo credits in this post go to Monica Heilman.
how to use faber castell watercolor pencils
Source: https://www.incredibleart.com/watercolor-pencils-guide/
Posted by: herreravised1943.blogspot.com
0 Response to "how to use faber castell watercolor pencils"
Post a Comment