

how to draw a simple person
How to draw a person
Whichever kind of artist you are, understanding how to draw a person is a fundamental skill. Master the human form, and when it's time to start creating your own character designs, you can use that knowledge to change the proportion of the body but still have it look structural and believable.
In this tutorial, you will learn how to draw a person, starting first by finding the proportions with a simple frame structure, then building volume and form, and wrapping everything together by drawing in the finer details, including subtle overlaps and curves. The tutorial will also cover how to easily make the figure more feminine by changing areas of certain body parts. This lesson is based on very basic proportions of the human body, so depending on what body type you want to draw, you can always just adjust the proportions accordingly.
It is highly recommended to study human anatomy to further your understanding of the muscle and bone structure of the human body if you want a highly believable artistic representation. If you need help in specific areas of the human body, be sure to take a look at our post on how to draw muscles, our focus on tricky areas such as how to draw an arm, or our many other how to draw tutorials.
01. Block in the head
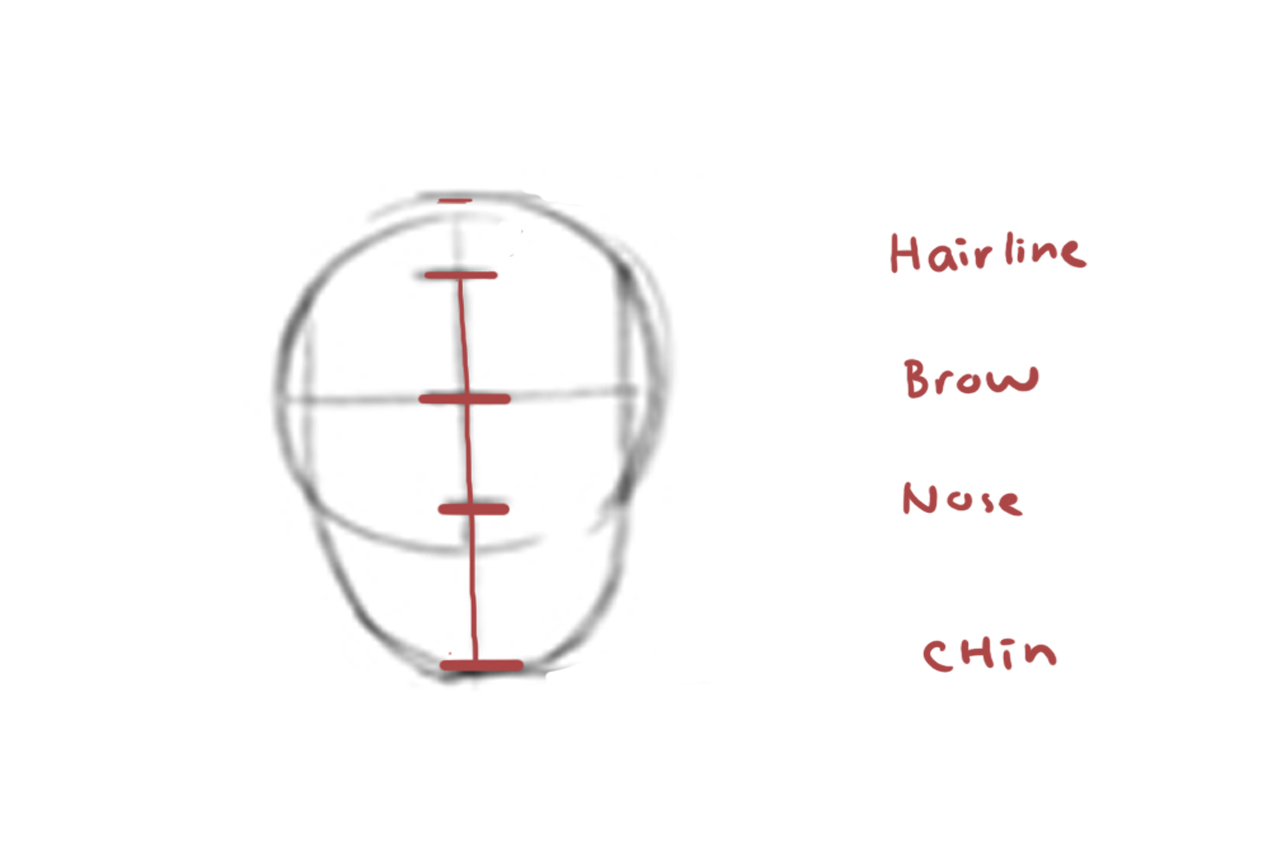
Block in the head with a circle divided into quarters. The hair line starts 1/3 down from the top of the head. By taking the distance from the hair line to half the circle, we can locate the base of the nose and the chin.
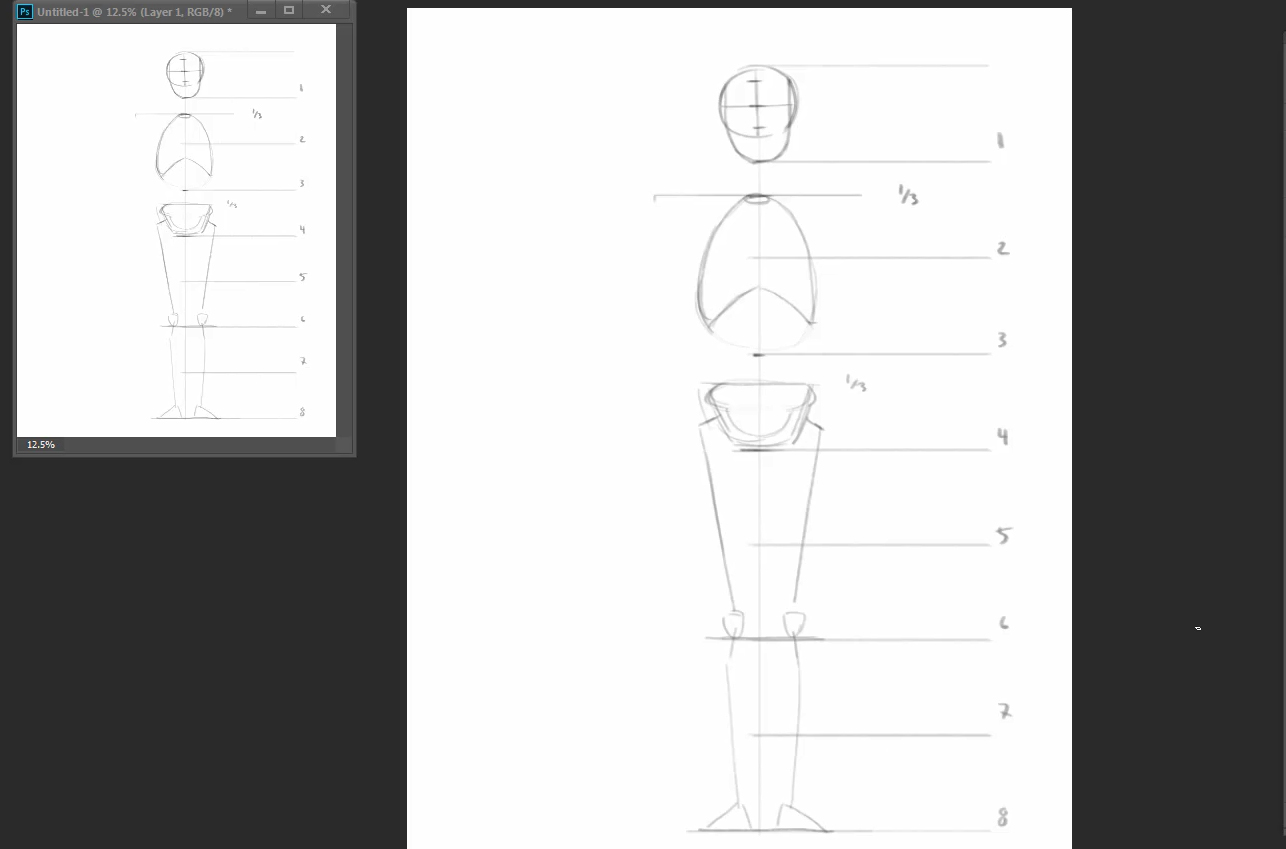
02. Measure the height of the figure

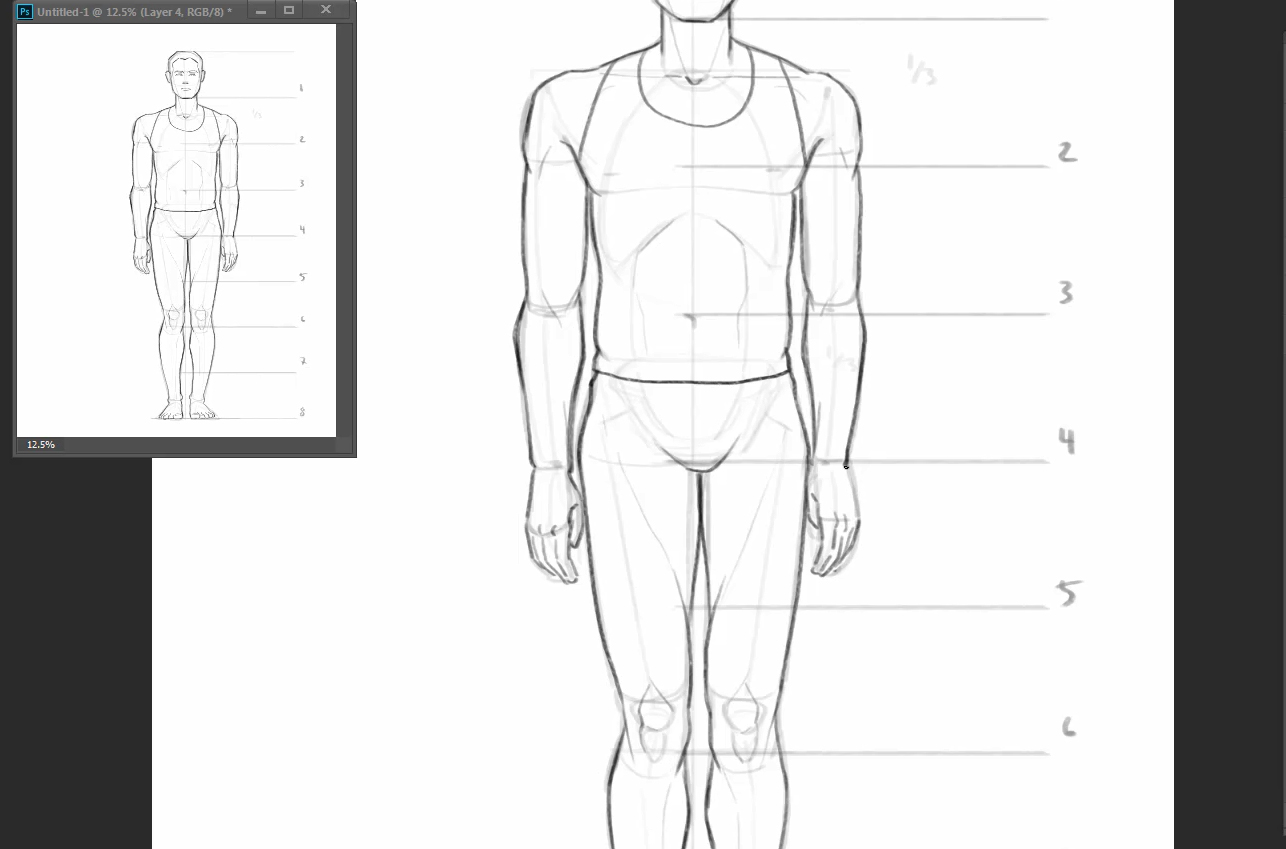
Take the height of the head and stack them to measure the eight heads. This will serve as guidelines to find the proportions of the different body parts. The shoulder lines up 1/3 way down section two, the torso ends at section four, the navel at section three, and the bottom of the knee at section six.
03. Block in the basic shapes

The overall rib cage is an egg-like shape from the shoulder to the navel. At the bottom, slice out a piece to form the arch in the rib cage. At the top, cut open a small hole for the neck. The bucket-shaped pelvis sits one third of the way down section four. Have the bucket tilting forward so you're able to see the inside. Slice out the front with a big 'U' shape so the abdominals can sit in between the ribcage and the pelvis.
04. Attach the leg frame
The legs frame comes out from the pelvis then bends right down, slightly coming in towards each other. The bottom of the knee stops right at the bottom of section six, and continues down towards the feet. Block the feet in as simple triangle shapes.
05. Attach the arm frame

Draw in the shoulders with big triangular masses connected to the ribcage. From the shoulder the arm connects and drops down to the elbow at the bottom of section three, where the forearm continues down to the wrist at the bottom of section four. For the hands, block in two long triangular shapes, which represent the palm and fingers.
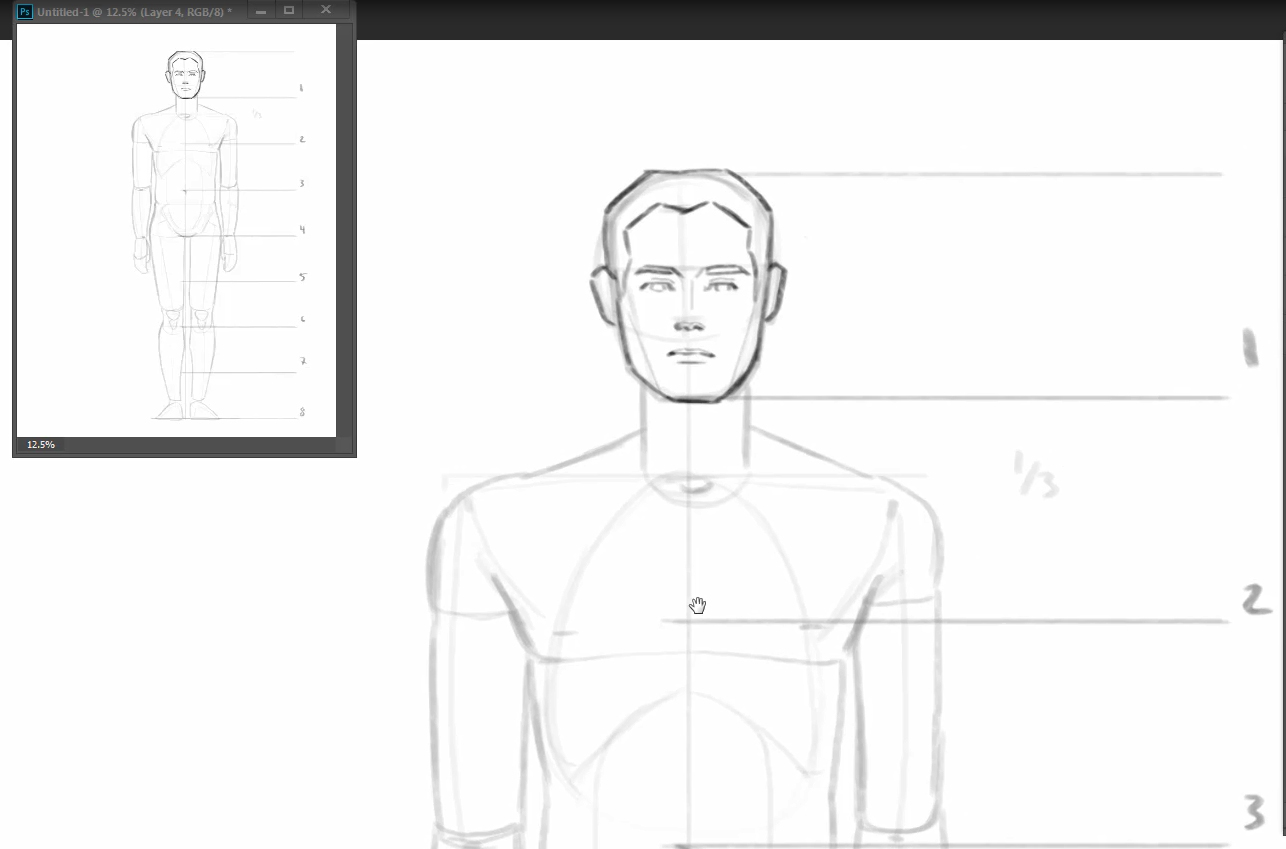
06. Construct the body

The shoulder muscle comes out from behind cylindrical neck, which connects to the edge of the shoulder frame. Right below section two, the chest overlaps the arms and the upper torso. The rest of the torso will follow along the boney rib cage but curves out to indicate some fat around the stomach area.
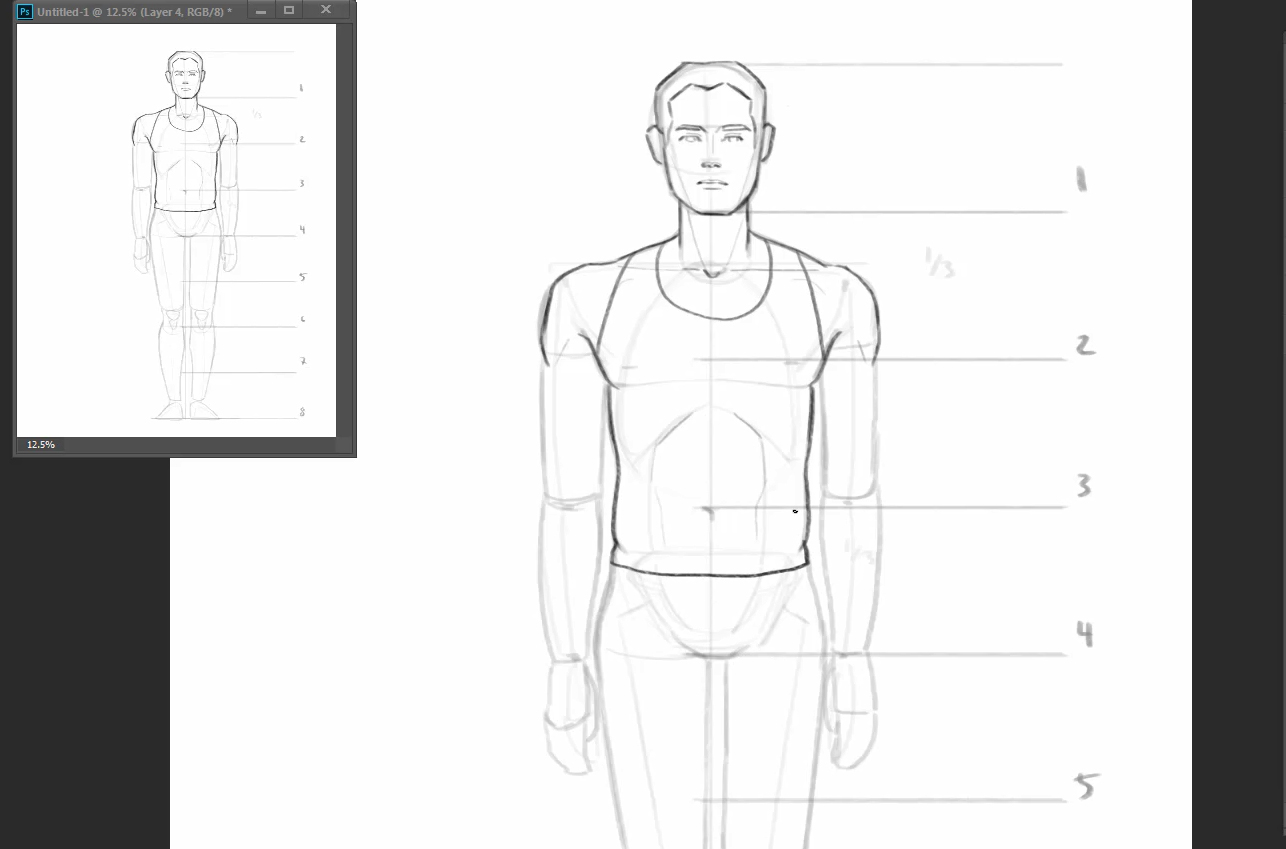
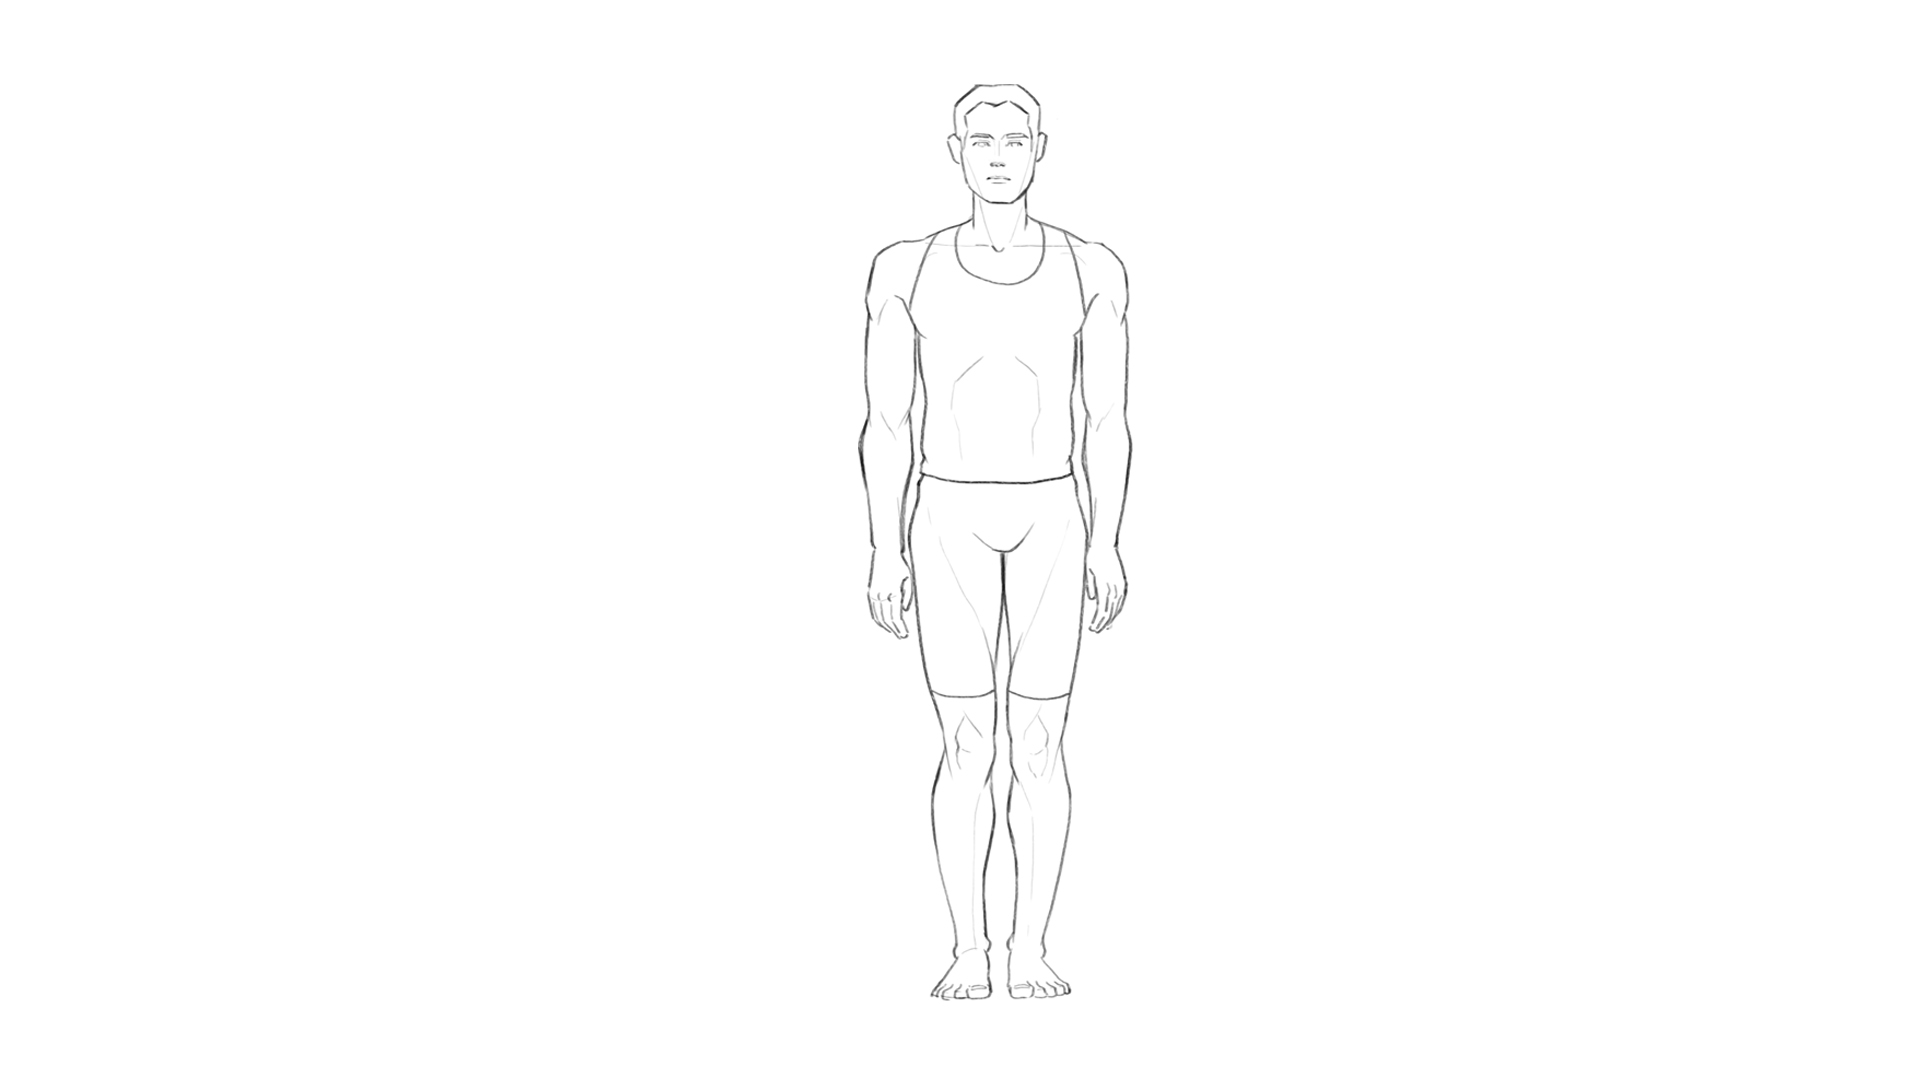
07. Fill in the limbs

Following the frame, draw in the legs like tapering tubes. There will be two bumps to form the kneecap. And as you go down the calves, make sure that the tube gets thinner as it approaches the ankle. The same applies to the arms, making sure the arm tapers into the wrist.
08. Draw the facial features
Detail out the facial features following the under drawing. The ears start from the eyebrows to the nose, and the mouth sits one third down to the chin from the nose.
09. Draw in more detailed overlaps and curves
Keep in mind of the areas that have boney landmarks will be more visible and drawn more sharply compared to area that is covered in muscle or fat.
10. Draw subtle curves of the legs
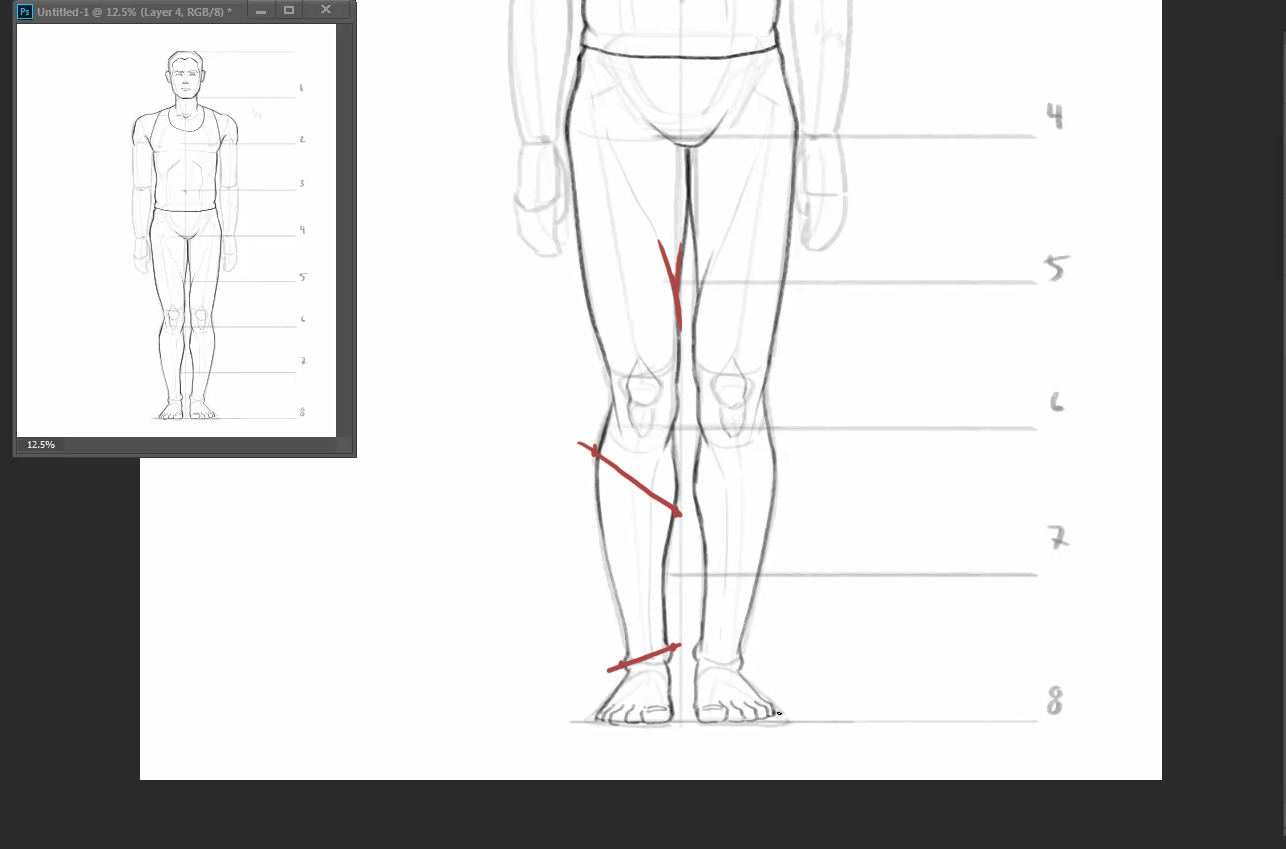
As we shape out the leg, the inner thigh has a muscle that overlaps the other muscles near the bottom. Draw in thin light lines to indicate the boney kneecaps. For the calves, the inner side of the muscle will sit lower than the outer area. For the ankle the opposite applies; the inner bone is positioned higher than the outer bone.
11. Draw the arm muscles
The shoulder muscle wraps over and around the arm, whereas the biceps comes from under the chest down to the forearm. Draw in the forearm tapering into the wrist, and detail out the fingers and knuckles.
12. Use the same frame to draw a female
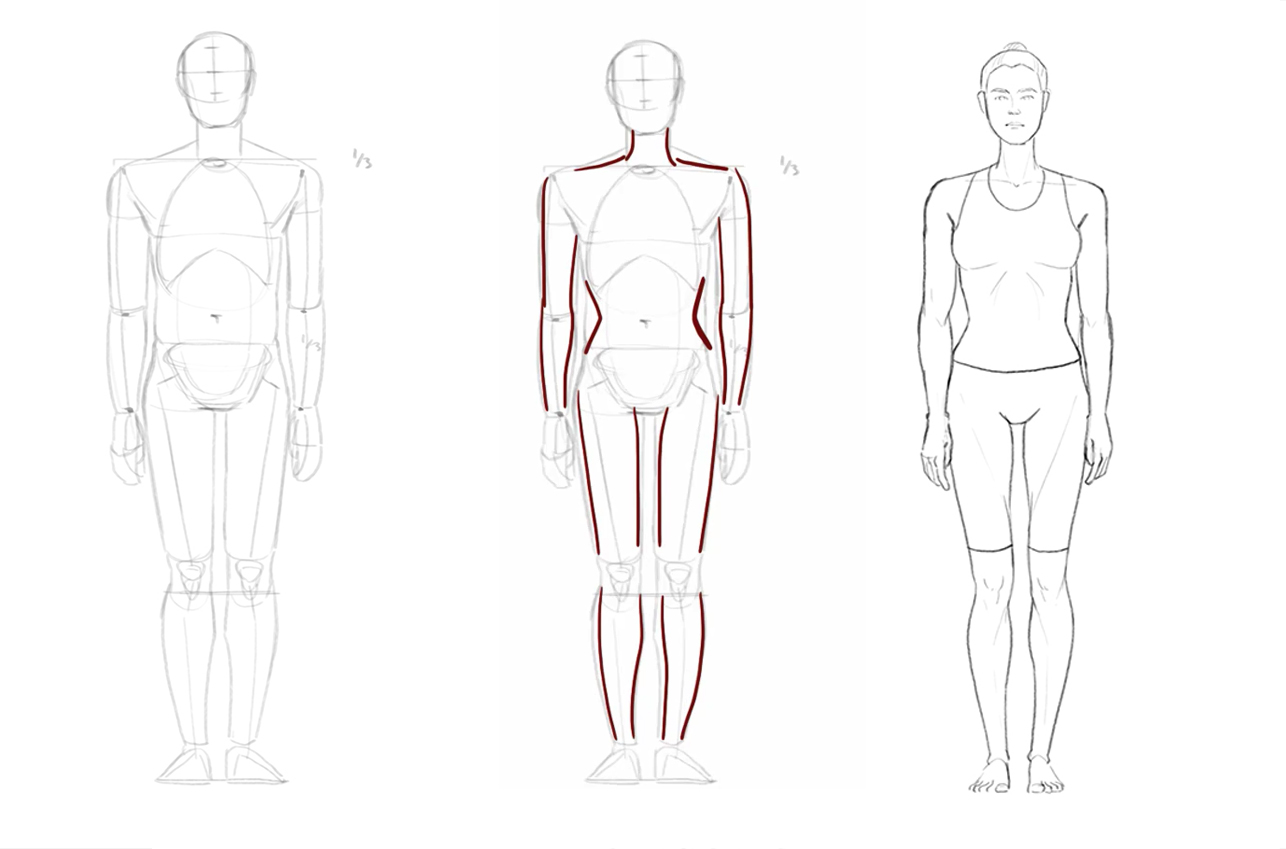
If you are looking to draw a female character, there are a few key points to adjust without changing much of what we've done.
If you draw areas like the waist, limbs, shoulder and neck to be slimmer and curvier, it can imply a more feminine figure. Even though I'm changing up a lot of the curves in the body, it still maintains the structural frame of the figure.
Read more:
- How to draw a figure
- The best pencils for colouring, drawing and sketching
- The 11 best drawing books

Masae Seki works at Imaginism Studios as a character designer and illustrator for film, tv and book publishing. She has illustrated numerous books for Disney and is a character designer on the Netflix film "12/24" (2018).
Related articles
how to draw a simple person
Source: https://www.creativebloq.com/how-to/draw-a-person
Posted by: herreravised1943.blogspot.com
0 Response to "how to draw a simple person"
Post a Comment